In my last post, I was tinkering with building a simple test harness and talked through how I might improve on that. My first real iteration on that was actually starting from scratch, and approaching it from a different angle.
What I’m aiming for in the next set of iterations is being able to feed inputs to a pipeline and “watch it work”. So….I just need a pipeline….and this is where today’s excitement begins.
Github and Actions
I have some familiarity with Azure DevOps, with some loose knowledge of how it works and integrates with Azure. But I don’t really have my own ADO play space. What I do have, however, is my own Github account with my own Azure tenant and MSDN-based subscription. Since the world seems to be leaning more towards Github, that’s where I intend to play.
About a week ago, I looked into this and actually got myself a bit overwhelmed. So, I set it down for a few days and recently revisited it. I decided I’d simply start at square one and look to build a Github Action which “creates a resource group”. That’s the baby step – once I could get that far, I could expand on that to build out the rest of my test harness. What follows was the result of about an hour or so of focused time to really figure this out for myself.
Git’ing A to talk to B
The first step was really looking into what it takes to allow code in my Github repo to be authorized in my Azure subscription, and for that I started here at Microsoft’s docs around options.
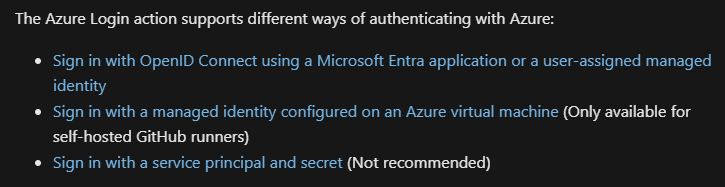
Before reading this, I thought service principals might be involved – they are, but not recommended. I’d rather not go the route of something which isn’t recommended. I’m also not planning to build an Azure VM to act as a runner (which I assume is a VM to “run code”). So that leaves OpenID Connect. Again, Microsoft’s documentation is pretty thorough on this, so I slowly followed along.
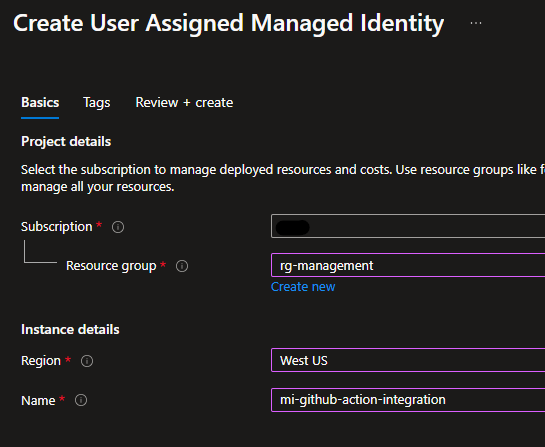
First thing that’s required is a managed identity – pretty easy thing to do.

From there, we’ll need some of the information out of the overview page (namely, the client ID and, because it’s conveniently located here, the subscription ID). We’ll also want the tenant ID, which can be found from the Entra pane.
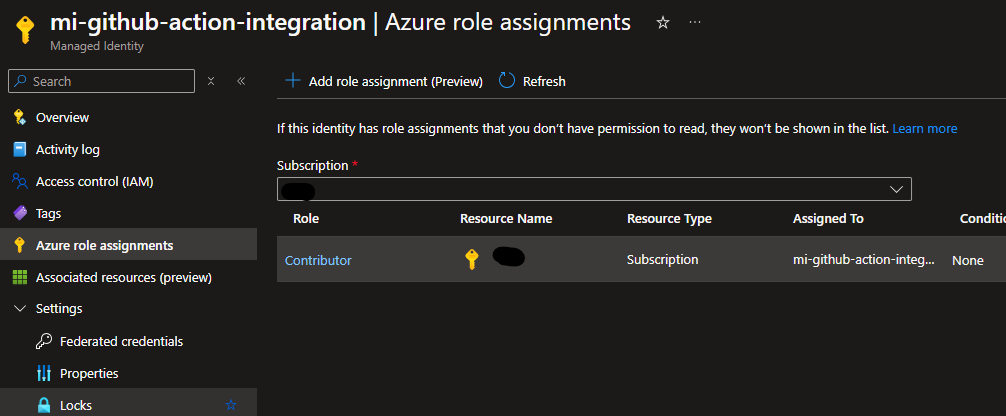
Next, we need to give the managed identity access into the subscription. I’ve admittedly given mine a lot of access by adding Contributor rights to the entire subscription, but I’m only testing at this point.
The next things I need to do is establish federated credentials.
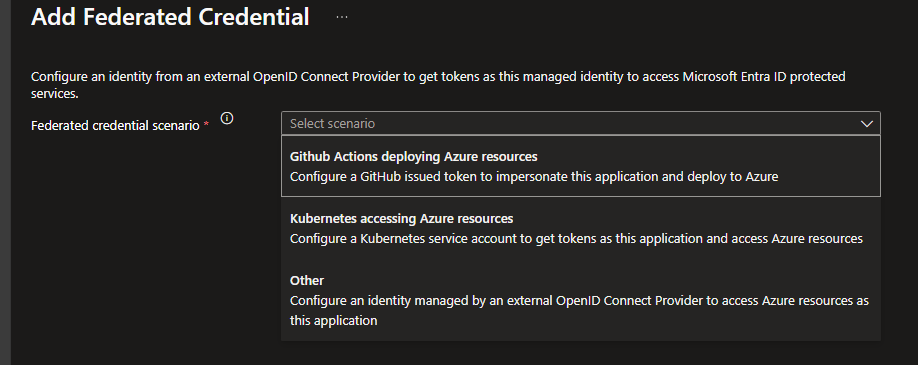
This seemed like it was going to be easy – only three options in the drop down, and Github Actions was one of them.
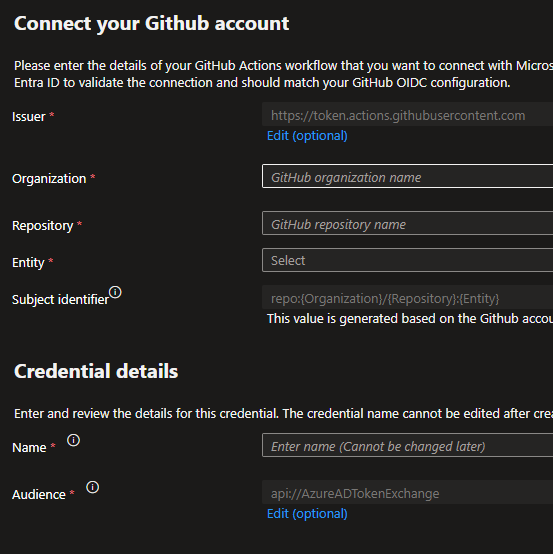
At first, this page was a bit intimidating, and in fact I came back here and had to adjust a couple of values here. But as far as I’m concerned, this is really where the glue gets laid down between Azure and Github. Ultimately, the values I went with look like this:
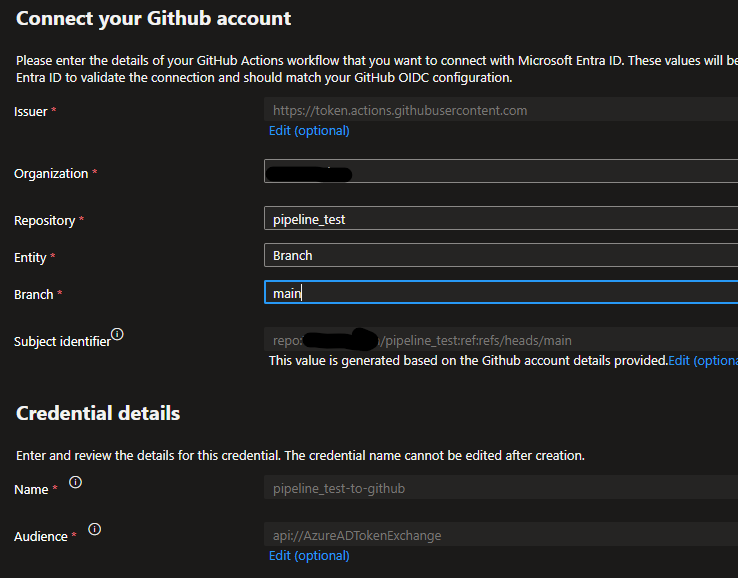
- Organization – This is merely the name of my GitHub user / “site”. I do not have an organization at this point, it’s a personal account.
- Repository – Simply the name of the github repo allowed to use this connection
- Entity – This was a setting I needed to change. I first went with environment, thinking I could build out a “dev” environment and base all the pipeline/code on that. Turns out, it requires the paid version of Github to use environments. So I instead went with targeting a branch.
- Branch – I just went with the main branch, since my repo is pretty straight forward.
- Credential details / Name – this is simply a unique name given in Azure to the credential and connection.
The final step to linking the two from an authentication / authorization standpoint is creating some secrets on the Github side with those client / subscription / tenant ID’s. This was probably the easiest step:

Failing to Succeed
Now that I seemingly had the two environments connected, it was time to test. I couldn’t just jump right into hucking my test harness code at it and hoping it would work, so instead I started small. I actually used an example snippet of code which again came from Microsoft’s documentation.
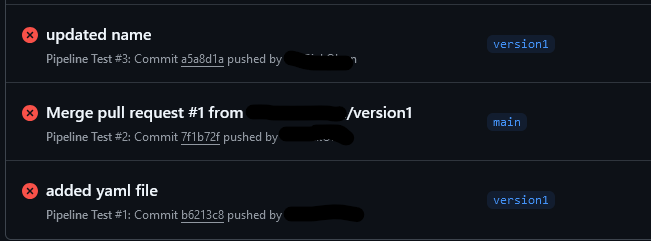
Failed mightily. Three times, in fact.
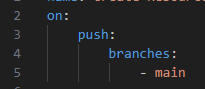
I had a couple of issues with the code, but the biggest came down to how it was being tested. I made the following change to the yaml file:
And test #4 was a success:
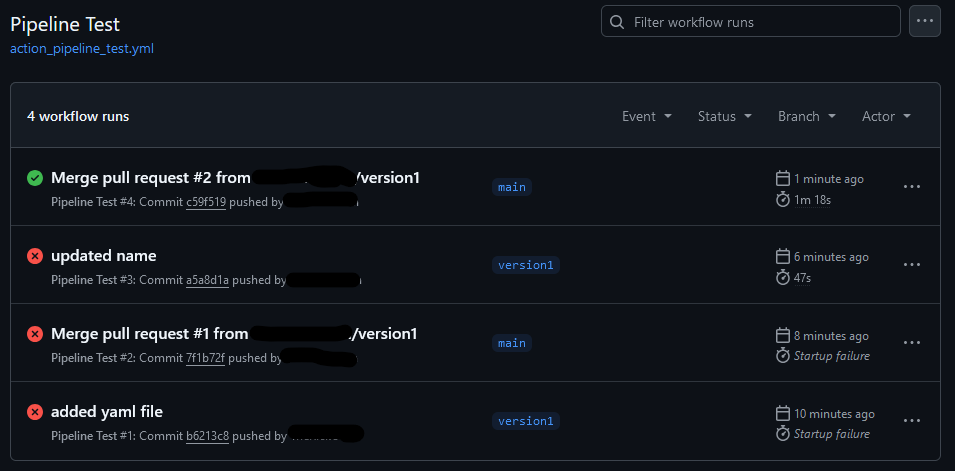
Of course, the code was neither exciting nor glamorous. All it was doing, from the sample on Microsoft’s docs, was issuing the Get-AzContext command, both in PowerShell and the similar command using the Az CLI. But…I’d proven connectivity between my Github yaml file and my Azure subscription.
Walking to Light Jog
With click-ops, we crawled. After my last post, I cleaned up my scripts a bit to where a single PowerShell script would build the environment and perform the tests. That’s walking. Now, I’m moving towards a light jog.
By simply changing some of the code, I have it building a resource group through a pipeline.
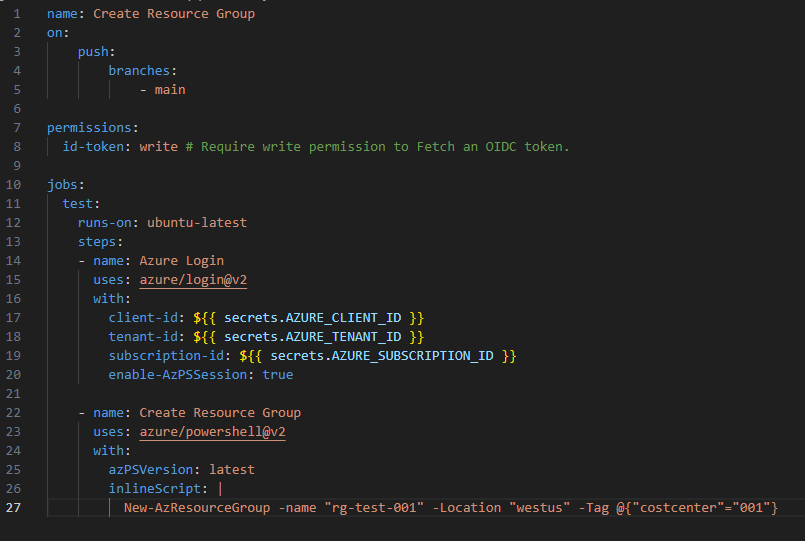

Again – this isn’t glamorous. This is not earth shattering. But it’s one small step towards doing something smarter; executing a pipeline to perform tasks without me having to run scripts and such locally.
Where I go from here is likely one of two directions, depending on what I want to learn and how I want this to run. In either case though, I need to figure out how to feed variables into the process (for instance, build a resource group using a name passed into the pipeline somehow). For my test harness, which currently exists as a single script – do I want to have my pipeline simply “run” that script? If so, I need to learn how to get the script to one of the runner machines and execute it. Or do I want to rewrite the entire script I’d previously written into multiple steps / tasks within this pipeline? I’m honestly not sure yet….but that’s the fun of tinkering, and there’s always #NightShift.